As a project over Christmas Break, I designed and built a digital garage door opener. My dad thought of the project and supplied the parts needed to complete the design while I wrote the software and assembled the hardware.
Check out the video of it in operation!
From a high level, I’m using a Model A Raspberry Pi as a web server to control the garage doors. I have a website running on our local network that when interacted with causes python scripts on run (one for the left door, and one for the right). Those scripts toggle the output pins that are connected to a 5V relay which is connected to the actual garage door opener. The scripts turn the relay on for one second which simulates a 1 sec button press on the garage remote, and then release the button for four seconds. Initially I did not have any timing in the design. Running the script at full speed, IE toggling the garage as fast as possible, actually cleared the programming in the remote. To avoid that, and any issues that would cause harm to the actual garage door system, I’ve put maximum rates in place. Additionally, the scripts check the contents of files to determine the garage door state before they run to make sure that only one instance of the program is running at a time.
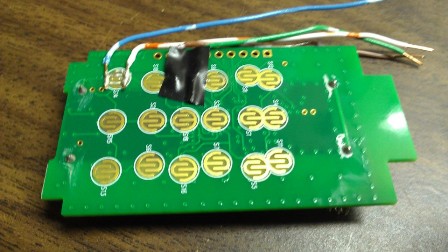
To connect the remote to the relay I first soldered wires to either end of the two buttons that I wanted to be able to interact with:
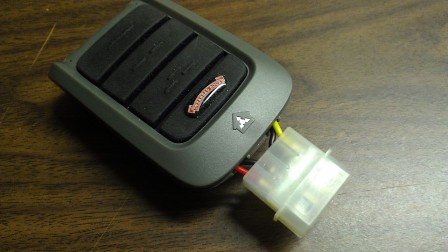
After using a dremel to clear out some space inside the remote, and connecting the small wires to a larger molex connection, I create the final remote appearance. The benefit of this design is that the remote still functions on its own. If we need an extra remote, it can just be unplugged from the relay.
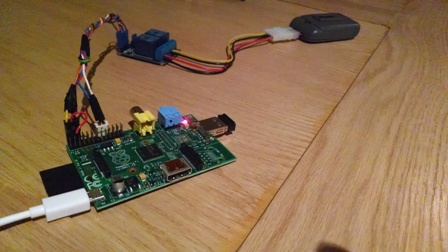
I left my breadboard and spare parts at Purdue, so had to improvise when connecting test circuits for the relay.

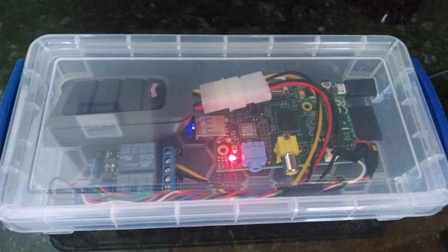
The entire setup can be seen below. The raspberry pi is the close board with the relay in the middle, and finally the remote in the background.
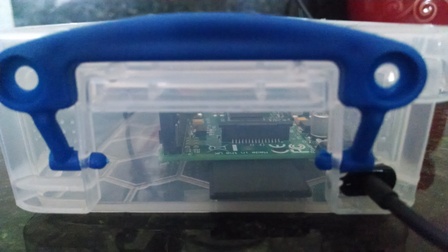
Once the system was tested, a small hole had to be cut in the case for the power cable.
And finally the project was complete, a garage door controller that worked both with a webapp, and with an android application.
One of the best features of this design is that no modification is needed within the garage, and really it doesn’t matter where the system is within the house. As long as the Raspberry Pi can connect to the WiFi everything should work.
The source code for this project was very simple. I put in some extra checks for safety, but as far as getting a base that functions, numerous tutorials can be found on Instructables.com. If you have any questions about the design that I used though, don’t hesitate to comment and leave your email.
Enjoy!
–Nathan