One of the surprises I’ve had from the rapid work from home switch is how bright my home office is on a sunny day and how dark it is on a cloudy day. I regularly have to switch my interface mode to be able to see my screen and continue working.
I found myself regularly opening up the system settings and changing the system theme, manually going to each desktop and changing the wallpaper, and manually toggling the theme of my terminal and other editors. Some tools auto-switch, but many tools do not.
To fix this, I’ve configured the following commands quickly keep working:
- Toggle system interface: ⌘ + Space, T, Enter
- Dark wallpaper: ⌘ + Space, D, Enter
- Light wallpaper: ⌘ + Space, L, Enter
Tooling Updates
My regular tooling is:
- Browser
- Chrome
- Safari
- Text/Source Editing
- Xcode
- Atom
- TextMate
- Tot
- iTerm
- SequalPro (Ace)
- Productivity
- 1Password
- Day One
Removing the tools that already have adaptive interfaces I was left with the following needs:
- Update Atom UI and Syntax theming
- Update Xcode Syntax theming
- Update iTerm profile
- Update TextMate
Atom
Install the mojave-dark-mode plugin.
Xcode
Xcode is a bit tricky. Nothing needs to be set up, but the way that theming works is not directly obvious. By default, Xcode will automatically adjust the navigation items, toolbars, etc. when switching the system theme, but the source editor will stay on the previously selected theme.
Out of the box, Xcode includes Default (Light) and Default (Dark). The naming
has no impact on the response to the interface mode. The only thing that matters
is the theme selected when in a given mode.
To configure Xcode, set the system theme to dark, and then pick a theme. Toggle to light, and then pick another theme. Those two themes will be automatically used for light and dark mode now.
ex: picking
Default (Light)while in dark mode, andDefault (Dark)while in light mode would make the UI and editor styles opposite.
The way that the theme is linked to the current system theme is not immediately obvious.
iTerm
iTerm can be extended using Python scripting after the Python runtime is installed.
I’m using a script from FradSer to manage this. The process is pretty simple.
- Select light/dark mode themes and update the script accordingly
- Add the script to
Application Support/iTerm/... - Select the script from iTerm > Scripts and approve the
Install Runtimeaction
The script is attaching a monitor to the iTerm effectiveTheme variable and is
automatically updating the profile in response to a variable change.
TextMate
TextMate is an unsolved problem. I have not yet found a way to dynamically update the theme. The priority here is lower with my daily notes in Day One, but it would still be nice to have given I use it as a scratchpad for terminal commands as well.
System Updates
System Theme
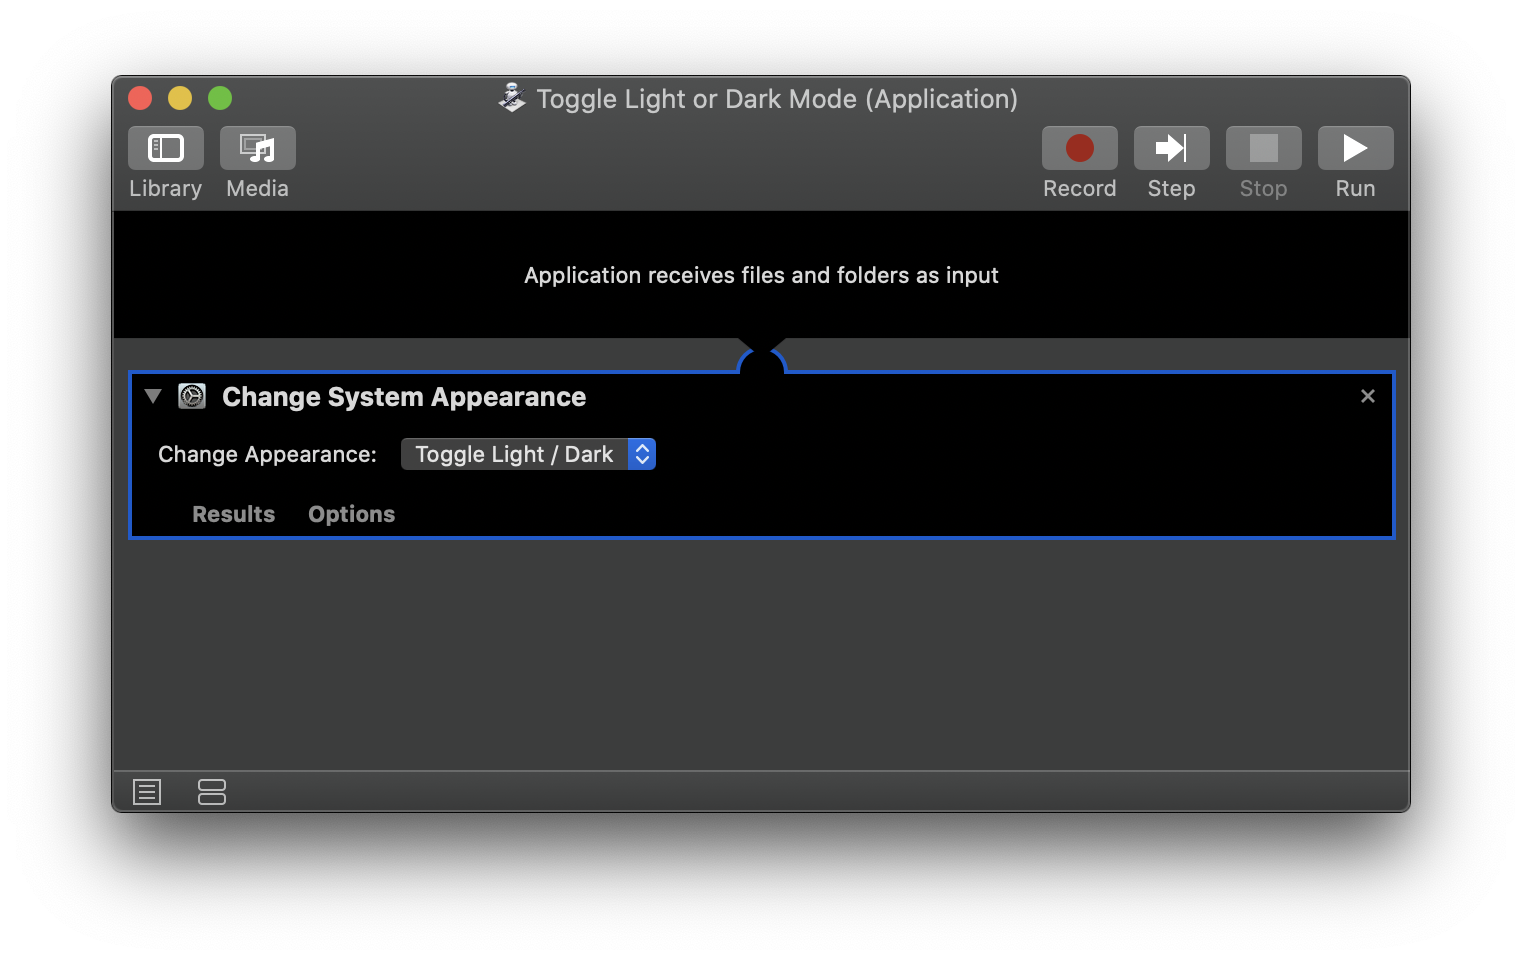
macOS Automator applications automatically show up in Spotlight search and are
a great way to manage system automation. I started with a simple automation to
toggle the system appearance. This Change System Appearance > Toggle Light/Dark
action is available be default.

By naming it Toggle Light or Dark Mode, Light Mode, Dark Mode, and
Toggle Mode are all valid name matches. Although I use it enough that T is
all that I need to type.
I can simply type “⌘ + Space, T, Enter” to toggle my system interface.
Wallpaper
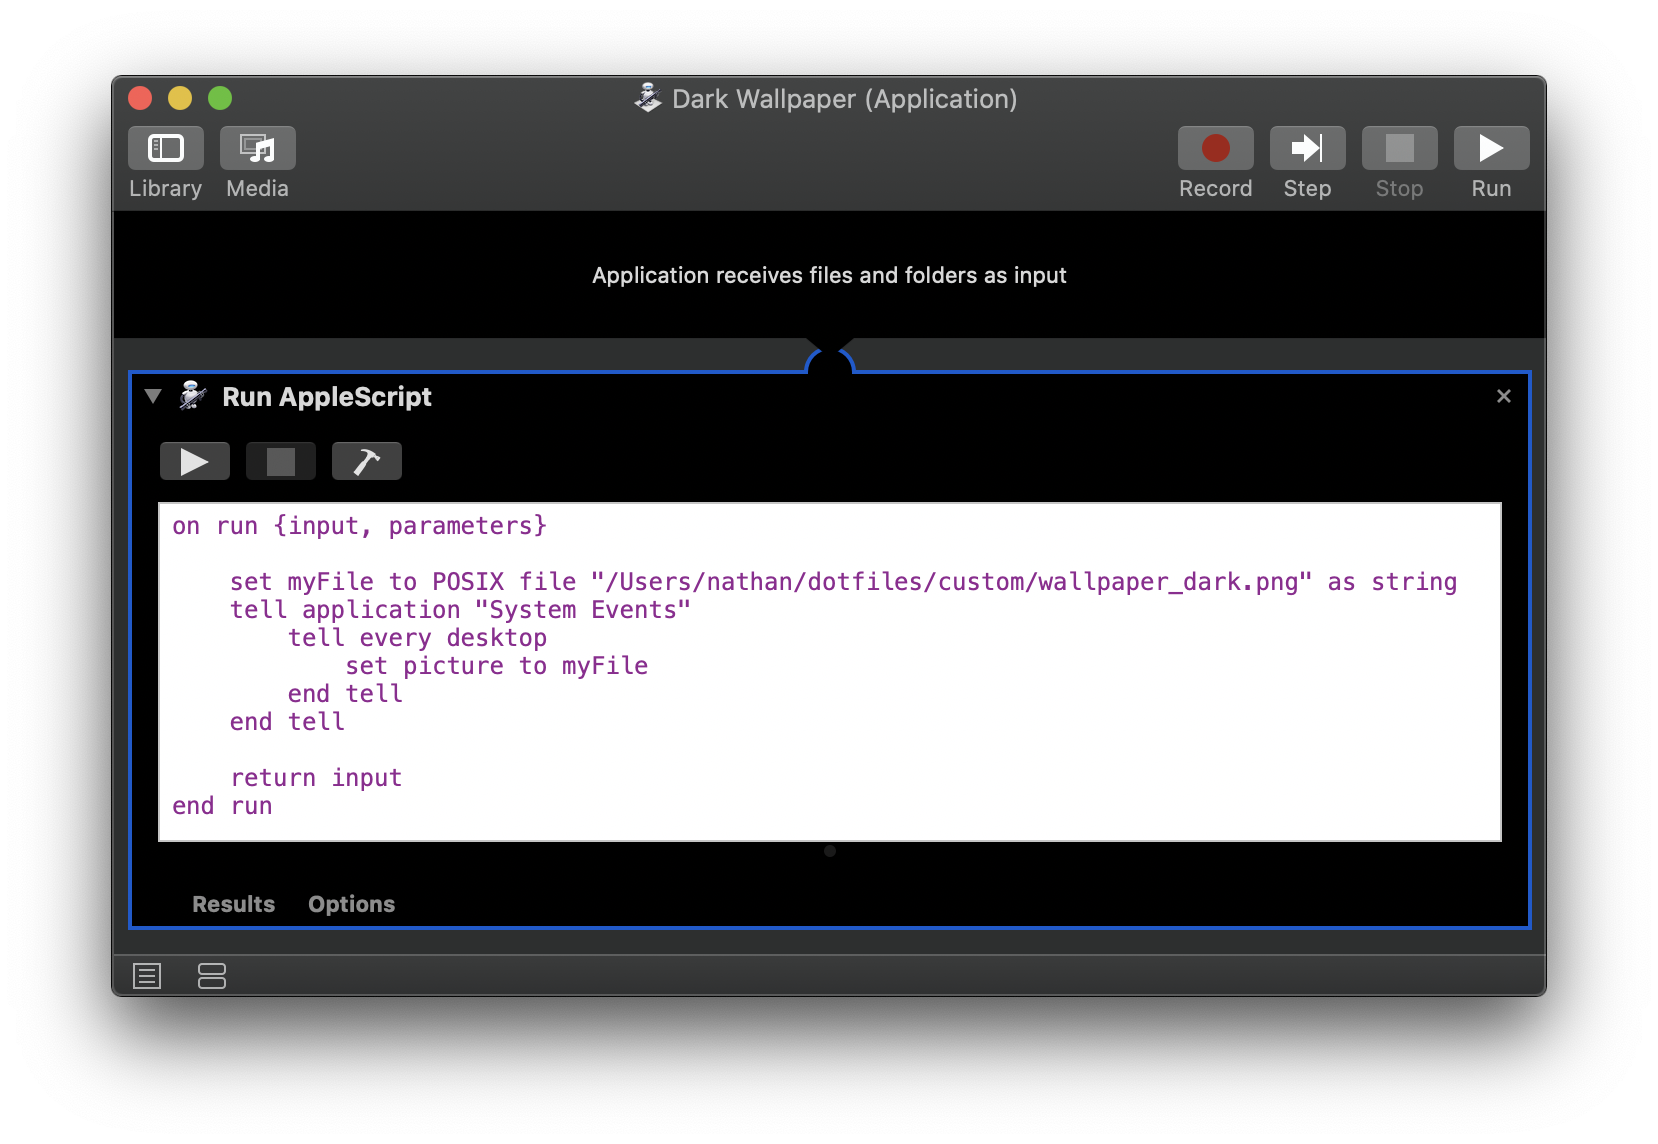
Wallpaper automation is a bit broken. AppleScript (theoretically) supports iterating over desktops and supporting setting wallpapers, but when iterating over “every desktop”, the results are significantly less than you might expect.

That AppleScript says tell every desktop, but only sets the desktop/space that
the user is currently looking at. This is probably a privacy feature as these
commands used to work.
To add the two wallpaper actions, make a new Automator Application with a single “Run AppleScript” that sets the path to either the light or the dark wallpaper. This enables:
- Dark wallpaper: ⌘ + Space, D, Enter
- Light wallpaper: ⌘ + Space, L, Enter
Note: All the automations must be run within Automator and allowed through the OS security rules before they will work in Spotlight.
Conclusion
I can now use Spotlight to trigger explicit wallpaper changes on a given desktop and can use Spotlight to trigger a system-wide interface change. My core tools all automatically adjust to the interface change or have been explicitly configured to listen.
Instead of navigating through layers of GUIs, I now have three main keyboard shortcuts that allow for instant reconfiguration.
This is a massive win for my productivity and happiness in my workspace.